
ASW 27 with a retractable engine
About five years ago, after roughly 20 years of “abstinence,” I took up model flying again. Back then, I was still a “wild” glider pilot. So I used an old glider model as my guinea pig, installing an electric motor in the nose. More models followed, and all of them had their own electric propulsion. This gave me the independence I wanted—at any time of day, regardless of whether a tow plane was on the field (yes, because in the meantime I had joined the MG Hinwil), always ready to soar in the thermals.
As a trained toolmaker, I’m fascinated by everything related to mechanics. So it’s hardly surprising that the topic of folding engines (KTW) on gliders never left my mind. After some back-and-forth about whether to buy one or build it myself, Mr. Wehrle (*www.flyware.de*) drew my attention to the KTW built by Mr. Helmut Kratt (*www.pk-ohg.com*) in Spaichingen. After several emails and phone calls, I decided to purchase it. On January 4, 2006, I picked up the KTW myself and received additional helpful tips from the builder. Once I got home, preparations for the installation were already underway. I had purchased the model—an ASW 27-B from S2G—on eBay about 1½ years earlier, and it was structurally ready for this installation. The retractable landing gear had already been installed further forward, according to FEMA’s specifications, to prevent pitch moment.
Let's get started! First, define, mark, and cut out the flap opening.
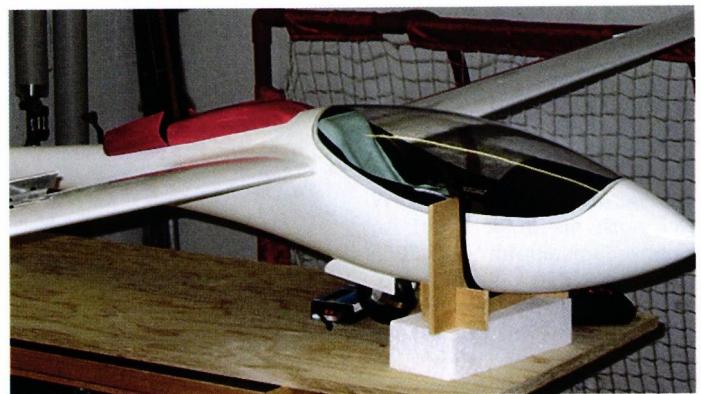
Oops! A nasty surprise! During the first test run, I realized that theory and practice are two different things. To give the KTW enough clearance to extend without hitting anything, I had to move it 5 cm further back. But then… the second surprise! The KTW no longer fit at the height of the fuselage and, in its final position, protruded about 3 cm beyond the fuselage.
ASW 27-B (B stands for "hump"!!!??). So, create a mold out of rigid foam and use balsa strips to make a double-curved flap. Scale modelers, please forgive me twice over:
1. The original ASW 27 isn’t available with KTW, and
2. the hump! Not scale-accurate, but it works.
Define the front and rear frames, trace the shape from the outside using cardboard, saw it out, and sand it down to ensure a proper fit. Mark and saw out all the necessary cutouts for mounting the KTW. Then test the first seat and adjust it if necessary.
My front frame is open at the top, which made the fuselage a bit unstable at the top. I found the solution in an auxiliary frame, which is fitted between the spindle motor and the drive motor and bolted in place on both sides.
I inserted 10×10 mm strips of hard balsa wood lengthwise in the direction of the flaps for reinforcement. The first few retraction and extension maneuvers gave me confidence, because everything fit perfectly except for a few quick files. The frames were reinforced with fiberglass mat. No further reinforcements were added. So, I fitted the flaps and attached the hinges. I filled and sanded them. Done! The flaps, along with the winglets and the fuselage nose, were painted bright red. The
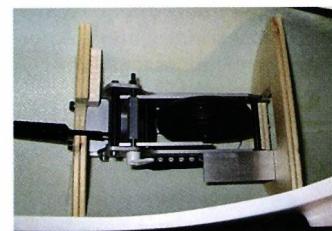
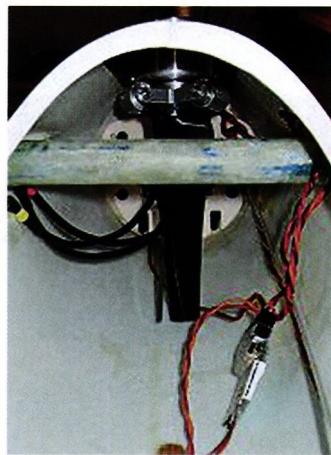
Two 12-series servos (Carson) with short linkages and brass eye screws in the flap are responsible for opening and closing the flap. The servos are glued directly to the wing joint using a support rib, providing the fuselage with a bit more rigidity in that area. Due to the low-profile fuselage, my cutout turned out larger than usual. As a result, the rear flap—which remains open when the KTW is extended—is also slightly longer. These rear flaps are opened by linkages attached to the front flaps and pressed against the side panel of the KTW by a small rubber piece. When retracting, the front flaps push the rear ones away by about 2 mm. This allows the landing gear to retract into the fuselage with sufficient clearance. So far, so good. Now it was time for the first test run with the entire powertrain. My heart was pounding! As usual, our laundry room served as our “test site.” First, we extended and retracted it several times. No problems! Now with power! What a surprise—everything worked right away!
Flaps out, landing gear down, front flaps closed, throttle wide open, gentle acceleration to 80%, then increase to 100% after 6 seconds (my heart rate at 200%!!!). Push the switch back, throttle back the engine, open the flaps, retract the landing gear, close the flaps. The entire procedure was carried out several more times without a hitch. It was done!
After making minor adjustments to the KTW control system by Stephan Merz (*www.sm-modellbau.de*) and to the controller (Caution: don’t forget the weak brake, or the flaps will be reduced to kindling!), the settings were just right.
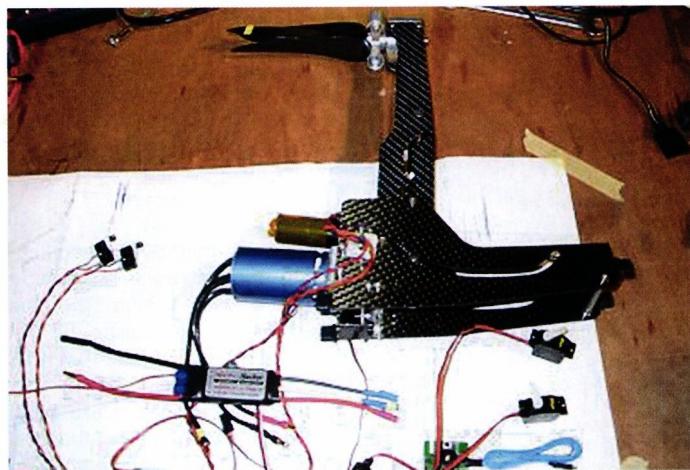
For models with a wingspan of 4 m or more
- Compact design
- Small flap opening in the fuselage
- 3-blade folding propeller
- Control electronics controllable via 1 channel
| Motor: | Flyware 650-F7 |
| ESC: | Jeti/Master 70-O-Flight |
| Battery: | Lipo 4S4PTP-8000 |
| Power: | approx. 40 A at 15 V , approx. 600 W |
Nothing stood in the way of the maiden flight except the weather. Mind you: the ASW had never been in the air either! One Saturday in May 2006, the time had finally come. So, I assembled the model, checked the controls, and tested the range. Even though it would certainly be safer to get the glider up to altitude using a tow plane first...? You can probably guess! No tow plane in sight! Just my buddy Kurt Deger with his electric glider. Oh well! The ASW 27-B is carried to the start of the runway. One last control check, engage the motor, and extend the tail. Kurt held the model for me until I gave a hearty “Let go!”, and off it went. I gave it a little altitude to counteract the pitching moment. The model flies off in a dead straight line. At first, I forgot to stabilize the plane longitudinally by giving it a little lateral input. After this correction and a slight pull, it took off and climbed beautifully. After a few turns, I reached an estimated 300 m. Then came the first in-flight landing. But wasn’t there a strange noise? (That’s right! Without programming a slight engine brake into the controller, the propeller’s teeth are gnawing at the flaps.) I repeated this procedure twice more, and everything went smoothly. As a reward for the daring maiden flight, I even found a good “tailwind” and began my approach for landing after about 30 minutes of flight. Surprised by the enormous effect of the air brakes, the landing fell into the “hopefully no one saw that!” category. Thanks to the FEMA EZFW’s suspension, there was no damage. Only then did I notice my knees were shaking. A preliminary inspection of the model revealed no damage other than the “nibbled” front pair of flaps. This KTW by Helmut Kratt is a mechatronic masterpiece. I’d also like to take this opportunity to express my heartfelt thanks to him for his professional support during the installation and maiden flight phases. Thanks also to Kurt Deger for his assistance during the maiden flight.
I highly recommend this KTW to anyone interested! Its simple design and hassle-free installation guarantee years of enjoyment. The engine can be used in various sailboats without any problems. The swap can be completed in an hour. *Martin Steiner*
For more information, visit:
martin.steiner@lwt.ch


News from HEBU

YOU KNOW WHAT I MEAN? 125 YEARS OF THE SWISS AERO CLUB
 Emil Giezendanner

F3A EUROPEAN CHAMPIONSHIPS IN ST-MACAIRE, FRANCE
 Matthias Bosshard

What's New at Leomotion.com

52. 2026 ALPS CUP
Emil Giezendanner
PRIDE AND GOOD IDEAS
 Markus Nussbaumer

EURO CONTEST GLIDER ACRO TOUR AUSTRIA 2026

TEAM MANAGER "THIS" BOSSHARD
 Rodito Nussbaumer

HORIZON HOBBY/LEMACO NEWS: MICRO OV-10 BRONCO 645 MM BY E-FLITE

BY YOUTH, FOR YOUTH
Lorena Betschen
CORSAIR F4U – A WARBIRD WITH A MEMORABLE LOOK
Jürgen Rosenberger, Jürgen Prinz
SMALL, MODEL-LIKE SAILBOATS
Res Dauwalder
TRY-OUT DAY AT MFV WETTINGEN
Urs Keller
34th HAHNENMOOS ALPINE MODEL AIRPLANE CAMP
Res Dauwalder
SUMMER FUN 2026 AT MG USTER
Martin Wunderli
WELCOME, NEW MEMBER!
Andrea Bolliger
FREE FLIGHT IN THE MIDDLE OF SUMMER
Urs Muntwyler
THE PC-21 STORY
Emil Giezendanner
TWIN TOWN PARTNERSHIP
Wolfgang Voeller
ATOM, THE NEW DOUBLE-DECKER FROM CPLR
Matthias Bosshard
COUPE DES ALPES – OBSERVE AND LEARN
Rodito Nussbaumer
INSIGHTS INTO THE HISTORY OF SEAPLANES

NEWS FROM HEBU
 Julia Bucher

FROM 0 TO 100
Markus Nussbaumer
MEMORIES
Wolfgang Völler
NOS REGION – A HUB FOR ELECTRIC AVIATION
Emil Giezendanner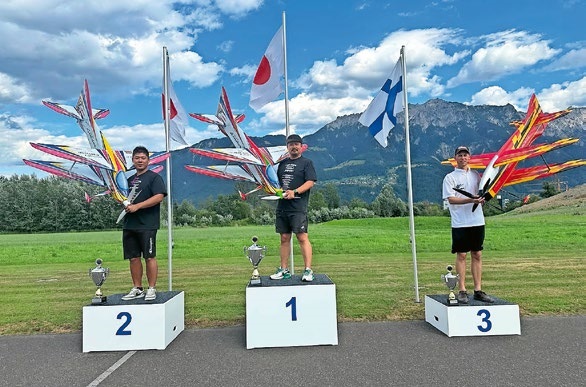
A SPECTACULAR F3A WORLD CUP IN THE PRINCIPALITY OF LIECHTENSTEIN
Emil Giezendanner
Have you almost forgotten about aircraft that take off and land vertically?
Emil Giezendanner